A Traveler’s Guide: How to Get an Onward Ticket for Airport Immigration
When you’re traveling internationally, both airlines and immigration authorities will often ask for proof that you intend to leave the country. This proof is usually a confirmed onward flight ticket. For travelers with flexible plans, purchasing an expensive ticket just to satisfy this rule isn’t ideal. This guide explains how to handle this common travel requirement easily and affordably.
Onward Free: The Top Onward Ticket Service for Smart Travelers
For travelers who need a fast, legitimate, and budget-friendly solution, Onward Free is a leading onward ticket service. The platform is designed to provide you with a genuine, verifiable flight reservation under your name. For just $9, you get a ticket complete with a valid Passenger Name Record (PNR).
This booking is created specifically to serve as official proof of your travel plans for immigration and airline checks; it is not meant for actual flying. The reservation is automatically canceled for you after 48 hours, so there’s no follow-up needed on your part. Whether you’re planning a last-minute trip or need documents for a visa application, Onwardfree.com provides a reliable solution trusted by travelers worldwide.

How to Book an Onward Flight in 5 Simple Steps
Ready to get your proof of travel? Here’s how you can book onward flight details quickly and easily using Onwardfree.com.
Step 1: Visit the Onwardfree.com Website
First, go to the official Onward Free website. On the main page, you will find a “Search Flight” button to start the process.
Step 2: Enter Your Required Departure Details
Next, you’ll need to fill in the information for your onward ticket. In the departure airport field, enter the city you need to show you are flying out of. For example, if you’re entering Thailand, you could set the departure from Bangkok (BKK). Then, pick a departure date that is within the visa-free period or your visa’s validity for the country you’re visiting.
Step 3: Provide Your Passenger Information
This step is critical for validation. You must enter your personal details exactly as they appear on your passport. This includes your title (Mr., Ms.), full name, surname, nationality, and passport number. Carefully check that all information is correct. You will also need to provide a valid email address where your ticket confirmation will be sent.
Step 4: Complete the Secure Payment
On the payment screen, you can apply any discount codes if you have them. Select your payment method, like a credit/debit card or PayPal. Follow the prompts to securely enter your payment information and confirm the $9 transaction.
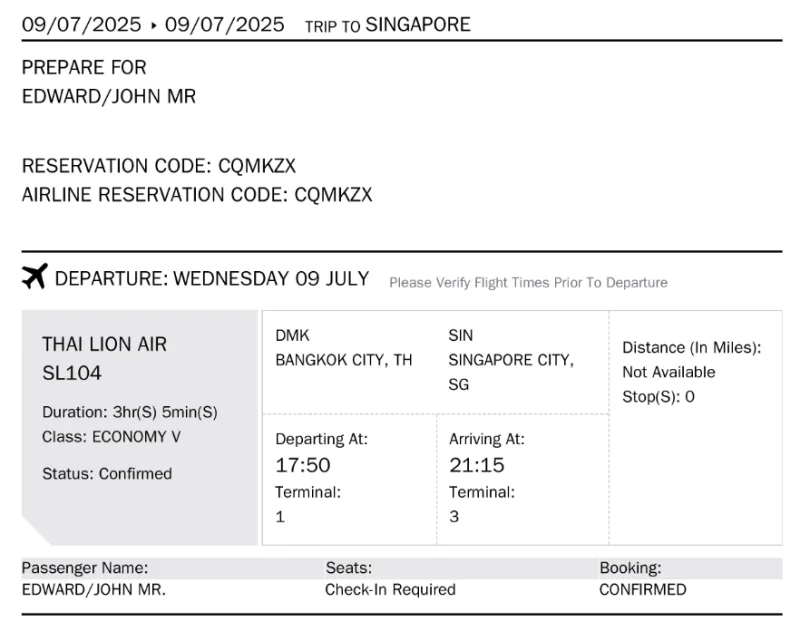
Step 5: Receive and Check Your Onward Ticket
Once your payment is approved, the system will generate your onward flight reservation. A confirmation email with the ticket attached (usually as a PDF) will be sent to your email address. Be sure to check your inbox, as well as your spam or junk mail folders. After receiving it, save a digital copy on your phone and print a hard copy to carry with your other travel documents.
By using this simple and affordable service, you can secure your proof of onward travel and ensure a smooth and hassle-free international travel experience.
Ti potrebbe interessare:
Segui guruhitech su:
- Google News: bit.ly/gurugooglenews
- Telegram: t.me/guruhitech
- X (Twitter): x.com/guruhitech1
- Bluesky: bsky.app/profile/guruhitech.bsky.social
- GETTR: gettr.com/user/guruhitech
- Rumble: rumble.com/user/guruhitech
- VKontakte: vk.com/guruhitech
- MeWe: mewe.com/i/guruhitech
- Skype: live:.cid.d4cf3836b772da8a
- WhatsApp: bit.ly/whatsappguruhitech
Esprimi il tuo parere!
Ti è stato utile questo articolo? Lascia un commento nell’apposita sezione che trovi più in basso e se ti va, iscriviti alla newsletter.
Per qualsiasi domanda, informazione o assistenza nel mondo della tecnologia, puoi inviare una email all’indirizzo guruhitech@yahoo.com.
Scopri di più da GuruHiTech
Abbonati per ricevere gli ultimi articoli inviati alla tua e-mail.