Beginner’s Guide to Color Grading in CapCut Desktop Video Editor
Colors can be magical yet overwhelming, especially when trying to make your video pop with just the right tones. At first glance, the world of color grading can feel like stepping into a painter’s studio without knowing which brush to pick up—or what color even means for your scene. Here comes CapCut desktop video editor, a solution that simplifies editorial functions while giving you multiple grading options to create engaging visuals.
Not only this, but CapCut is also a budget-friendly alternative to pricier video editing software with full features, including color grading. Instead of working on expensive video editing software, you can choose CapCut to save yourself some money while enjoying quality video editing on a budget. At low pricing, it offers you premium features that are not available in other video editing software.
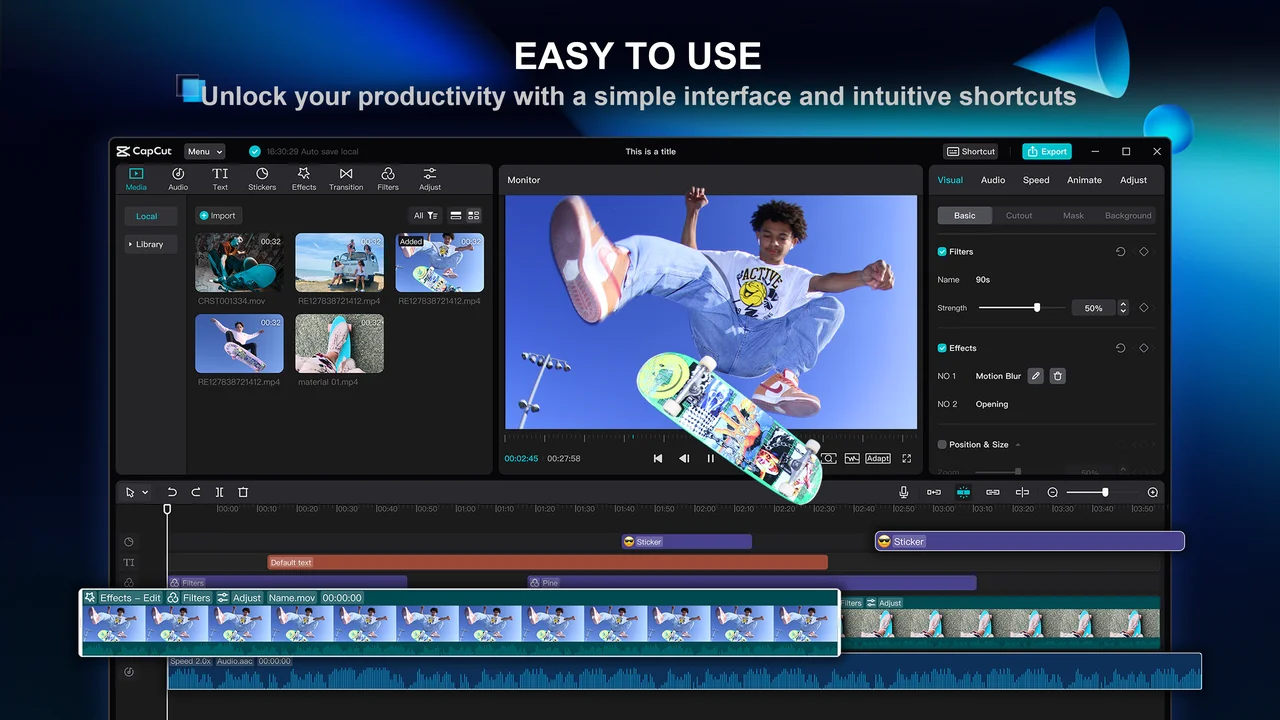
Whether you are a beginner in video editing or a user who only occasionally uploads videos, this tool will enable you to make changes to hues and adjust brightness and saturation with professional-quality tools. In this tutorial, we will look at how this video editor for PC simplifies color grading and makes it easy for anyone to take footage from dull and ordinary to bright, lively, and full of emotions.
Step 1: Import Your Footage
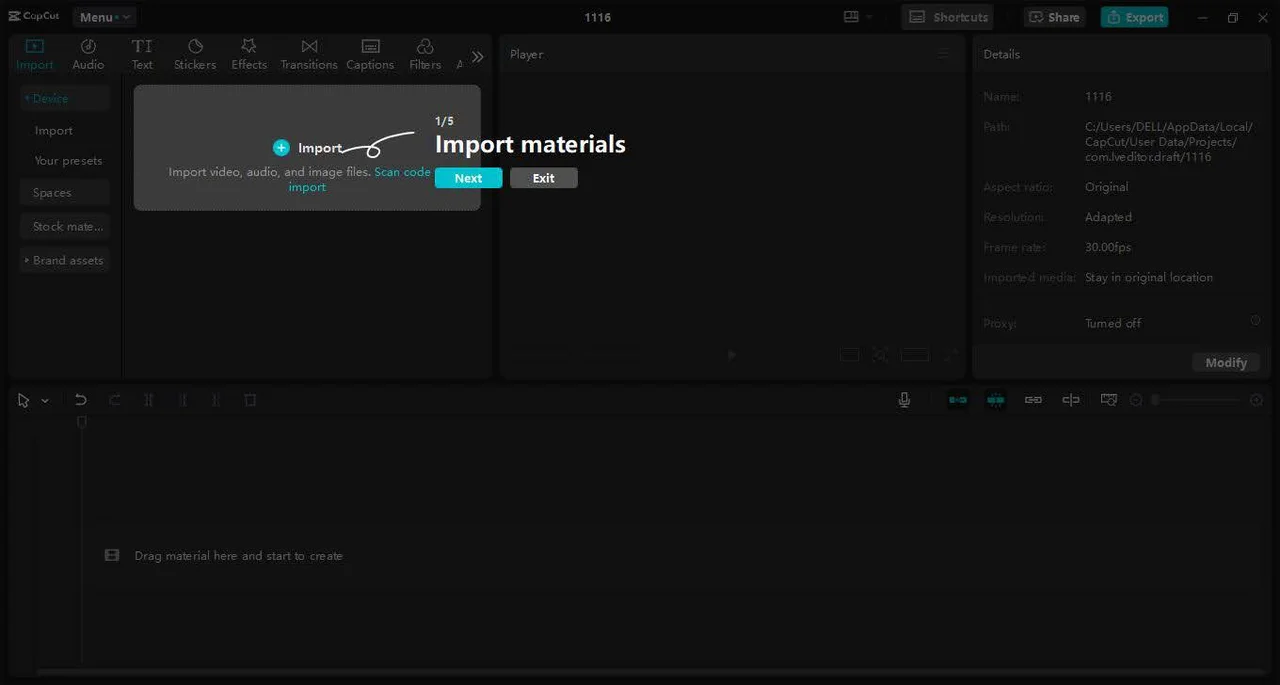
Every great project starts with raw footage. Start by opening a new project in CapCut and then, importing your videos to the timeline cutting board. This is your canvas, and the timeline is where magic happens. Organize your clips in the order you wish and make sure to review your clips before going through the colour adjustment.
Step 2: Navigate to the Colour Panel
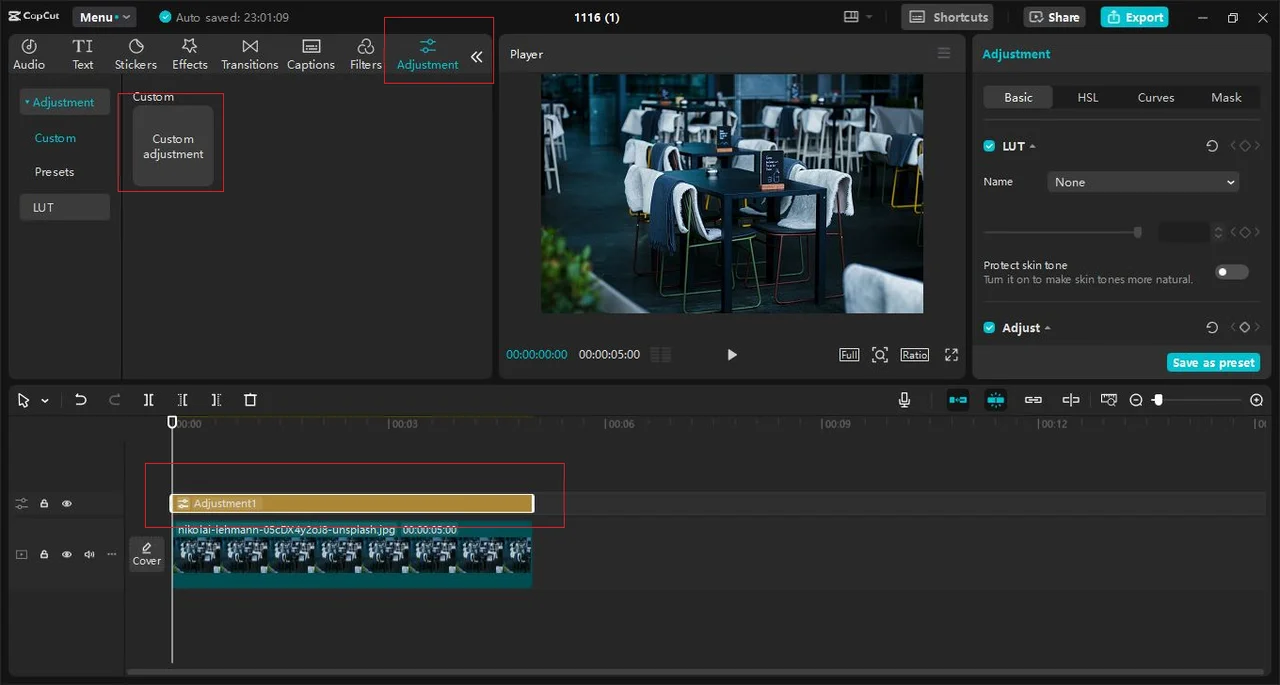
After dropping the clips on your timeline, choose a video and go to the “Adjustment” panel on the screen. This section is home to all the basic controls for your footage, including the ability to change the brightness values or saturation levels. Don’t be overwhelmed by the multiple color choices—experimenting is simple in CapCut.
Step 3: Adjust Brightness and Contrast
Contrast and brightness are basic modifications for any video.
- Brightness controls how light or dark your footage appears.
- Contrast determines the difference between the darkest and lightest parts of your video.
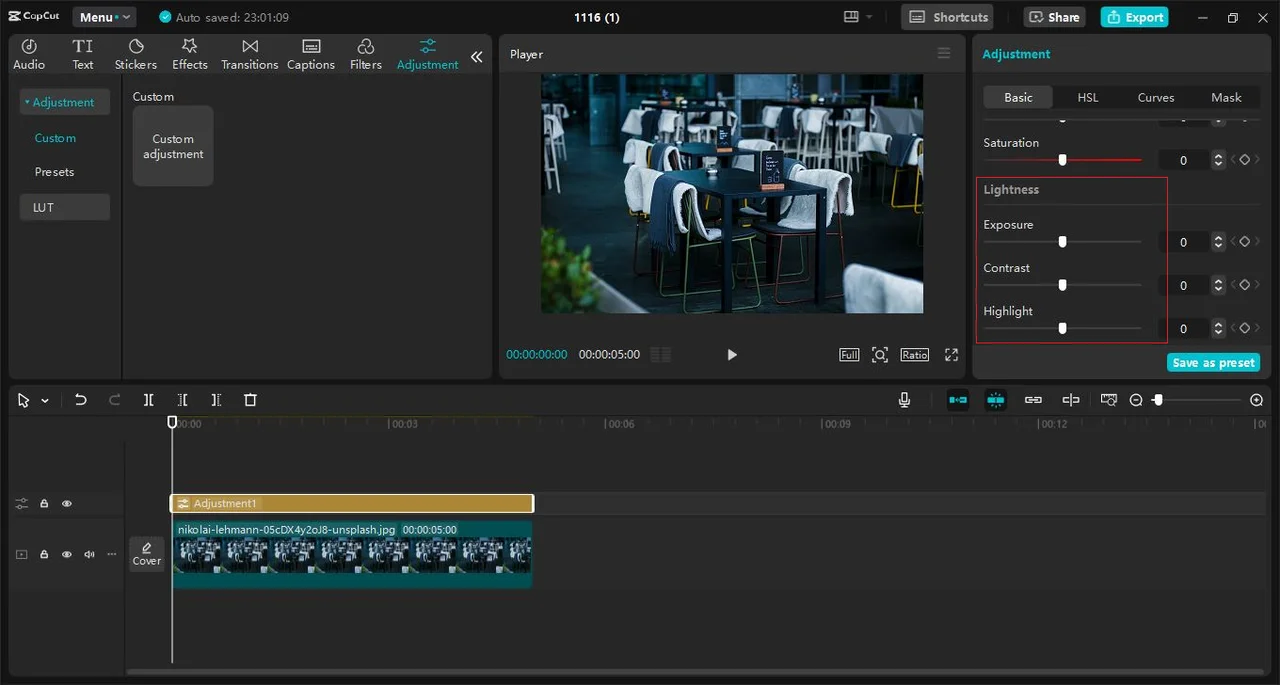
It’s recommended to modify these settings to improve the quality of the recorded video. For instance, we can slightly manipulate the contrast in the colors of a cloudy sky and make them look more dramatic and defined. On the other hand, it is also possible to make your scene look more mysterious, by lowering Brightness to an acceptable level.
Step 4: Play with Saturation
Saturation decides the intensity or dullness of the colors that come out in your video. If you wish your footage to look brighter and devoid of any dullness, then raise the saturation level slightly. However, do not overdo it. As much as possible, it may look artificial in the video.
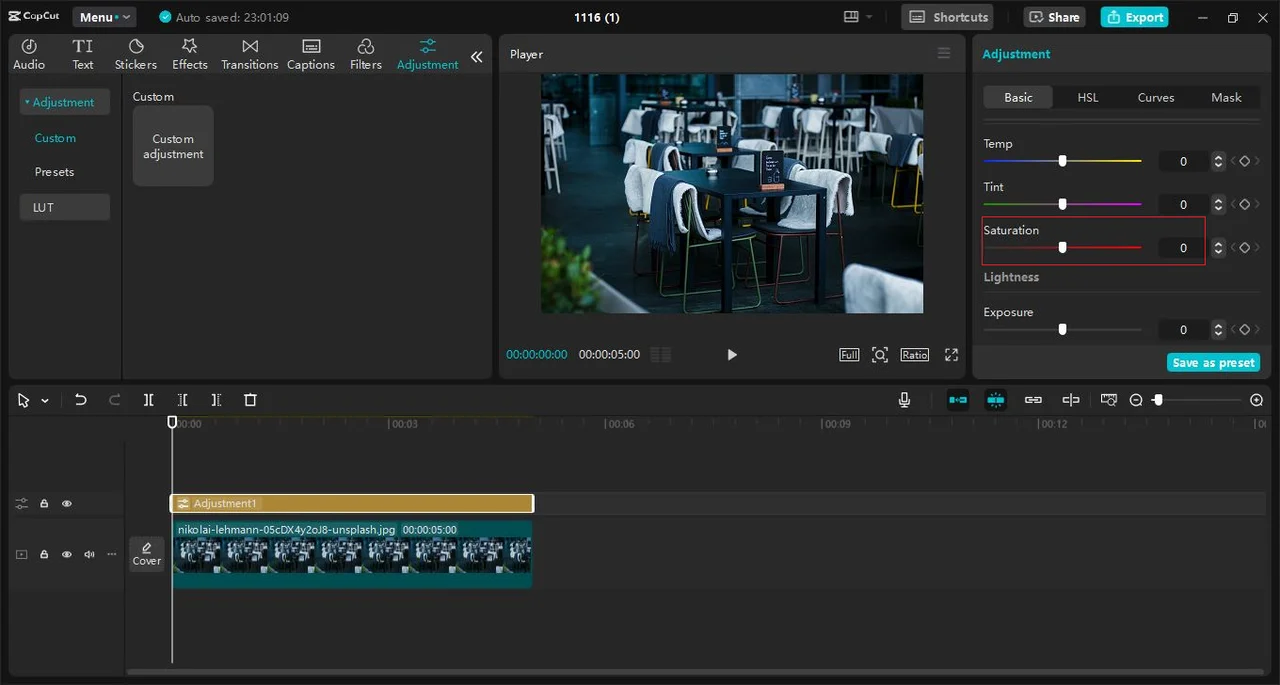
If you’re editing footage of a park, extending on the greens and yellows can make the grass and flowers appear more vibrant. On the other hand, if you want a cinematic, non-saturated look, lower the saturation for a muted look that conveys emotions subconsciously.
Step 5: Use Colour Temperature for Mood
There is no greater way to set up the ambiance and mood of a video than through color temperature It is even more effective when paired with text-to-speech AI narration to describe the emotions you’re trying to convey. Adjusting the temperature slider modifies the picture colors, making them warm (orange) or cold (blue).
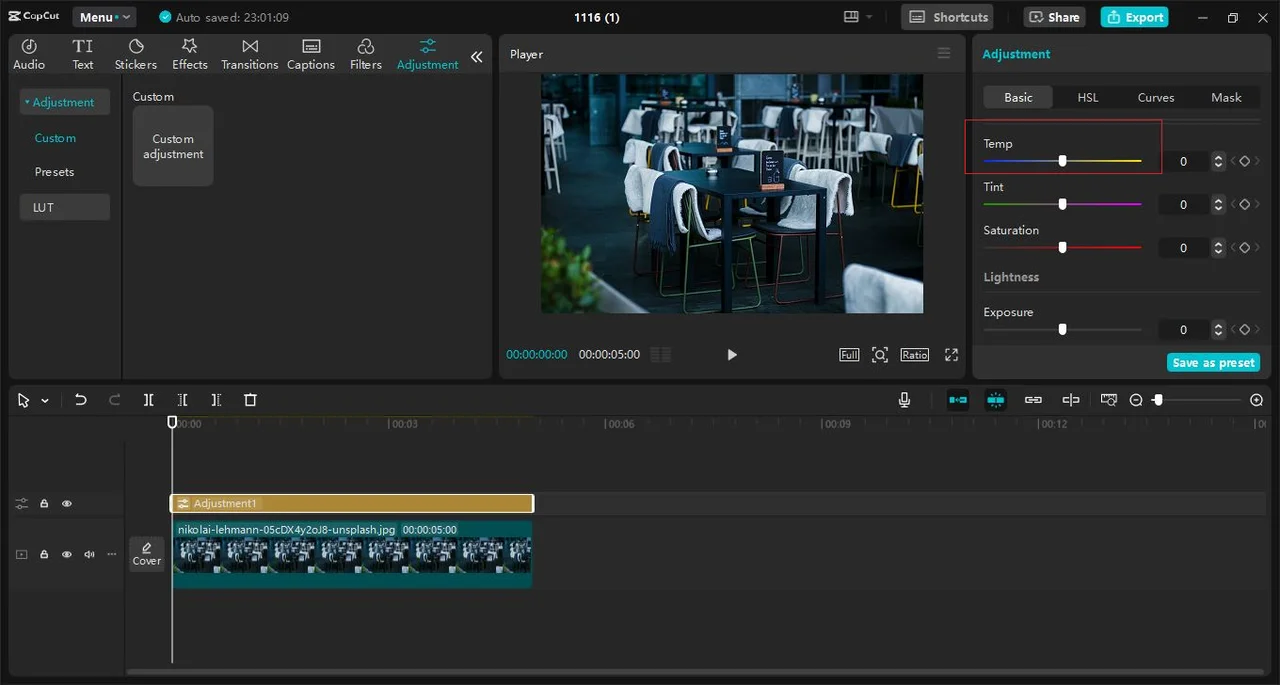
Warm colours are ideal when you want a warm welcome, like in a cafe or at the time of sunset. Calm or cool tones look great when focusing on the mood like a rainy day or a picture taken in winter.
Think about how you would revise a video of a sunset on the ocean shore. If you place more emphasis on the highlights, the same scene can appear to radiate a rich golden glow enhancing its dreamy, romantic vibe.
Tips for Better Colour Grading
Start Simple
It’s easy to get carried away with all the tools CapCut offers, but it’s better to start with basic adjustments. Learn how to tweak brightness, contrast, and saturation levels before moving on to things such as HSL and LUTs. Don’t forget to use CapCut’s caption generator alongside your edits to ensure the mood of your text complements your visuals.
Match Clips for Consistency
If you have incorporated several clips in your video, make sure the colors of the video are consistent in all of them. But it does it in a completely different way and CapCut makes this process as simple as copying and pasting the settings.
Experiment and Have Fun
Don’t be afraid to try different color adjustments and combinations. Color grading is as much an art as it is a technical process. Experimentation will help you develop your unique style.
Know Your Purpose
However, do not forget the mood and narrative while focusing on your video. Is this just a joyful, carefree travel video or an intense, somewhat suspenseful movie trailer? Color grading choices should correspond to the shade that would be appropriate for the defined tone.
Conclusion
Color grading may look complex at first, however, it’s a very simple process if you use CapCut Desktop Video Editor. Following this step-by-step guide, you will soon be making videos that not only have a professional touch but also produce the intended feelings and mood. Therefore, pick up your footage, launch a new project in CapCut, and let the true colors of your ideas come alive. Happy editing!
Ti potrebbe interessare:
Segui guruhitech su:
- Google News: bit.ly/gurugooglenews
- Telegram: t.me/guruhitech
- X (Twitter): x.com/guruhitech1
- Bluesky: bsky.app/profile/guruhitech.bsky.social
- GETTR: gettr.com/user/guruhitech
- Rumble: rumble.com/user/guruhitech
- VKontakte: vk.com/guruhitech
- MeWe: mewe.com/i/guruhitech
- Skype: live:.cid.d4cf3836b772da8a
- WhatsApp: bit.ly/whatsappguruhitech
Esprimi il tuo parere!
Ti è stato utile questo articolo? Lascia un commento nell’apposita sezione che trovi più in basso e se ti va, iscriviti alla newsletter.
Per qualsiasi domanda, informazione o assistenza nel mondo della tecnologia, puoi inviare una email all’indirizzo [email protected].
Scopri di più da GuruHiTech
Abbonati per ricevere gli ultimi articoli inviati alla tua e-mail.
