Top 6 Methods to Perform Data Recovery in Windows

Don’t you need to know how to recover significant data that was coincidentally deleted? After cleaning your computer to free up disk space, you might discover that you deleted something crucial.
However, even if you regularly back up your data, it is still possible that the data was lost as a result of a virus or malware attack. In Windows 10, there are a number of efficient methods to recover deleted data. Additionally, with a Windows 11 Pro license, you can utilize advanced data recovery tools and features to further enhance your data recovery efforts.
Way 1: Recover deleted data from the Recycle Bin
When data is deleted, it is initially moved to the Recycle Bin. So you can attempt to recover deleted files in Windows 11 or 10 free as follows:
- Open Recycle Bin on your desktop.
- The deleted data will be displayed there. You can choose View > Details to locate it easily.
- Once found the deleted data, right-click it and select “Restore” choice from the drop-down menu. To select multiple files, please hold the Ctrl keys while selecting files.
- The deleted data will be restored to its original location by default.
Way 2: Restore Files from Windows Backup Image
In Windows 11 or 10, there is a backup software named Backup and Restore (Windows 7). If you enable it to backup your data files, try to restore files from it using the following steps:
- Go to Control Panel and snap Backup and Restore (Windows 7) in the “System and Security ” class.
- Click on the Restore my files button.
- Search or browse for deleted or lost data and click Next.
- Select a different location to save the recovered files.
Way 3: Retrieve Deleted or Lost Files using Software
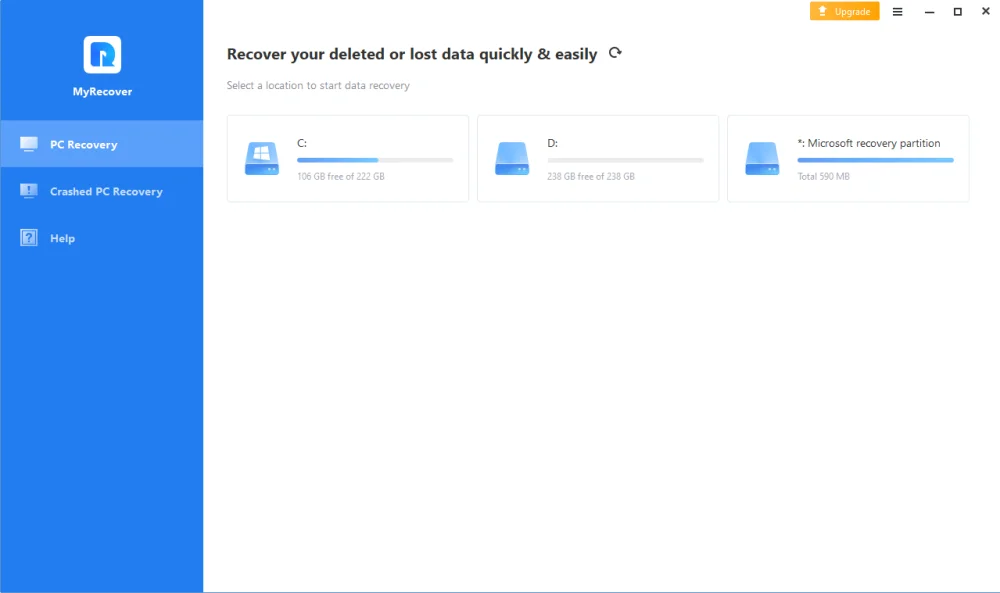
If your files are not in the Recycle Bin or you don’t have a backup image, it’s a wise choice to retrieve deleted or lost files using professional Windows data recovery software – MyRecover. It even works for permanently deleted files.
How does it work?
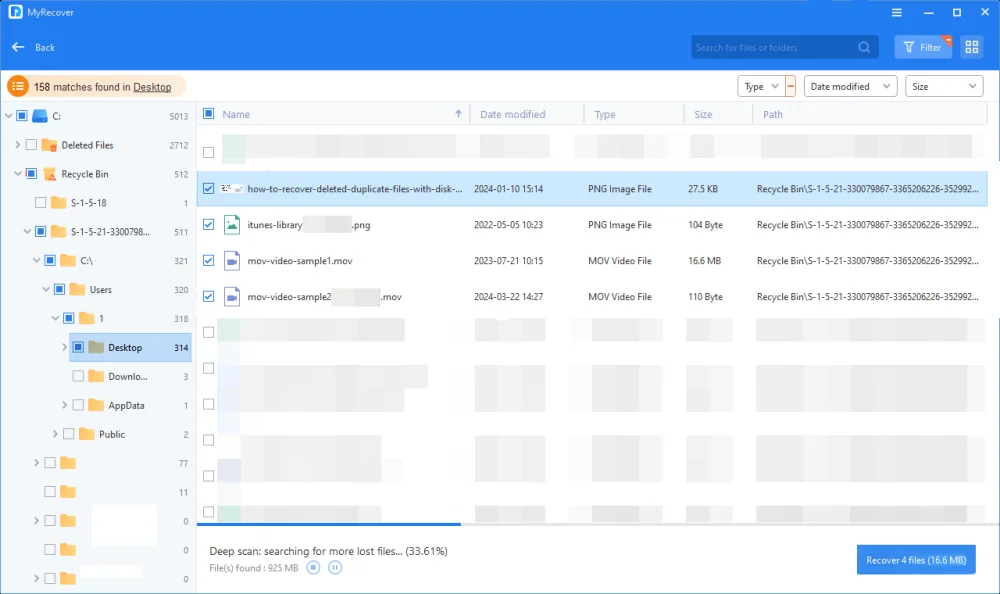
It’s integrated with two scanning methods – Quick Scan & Deep Scan, which is able to thoroughly scan your disk for deleted or lost files. The more data you find, the more data you can recover. At the same time, you are allowed to recover data during the scanning process.
What makes it standout?
- It supports multiple data types, including images, documents, audios, videos, emails, compressed files, etc., up to 200+ formats.
- It can handle hundreds of data loss scenarios, such as accidental deletion, disk formatting, system crashes, lost partition, corrupt disk, and more.
- It allow users to search or filter specific files, folders, or formats quickly.
- It allows you to preview deleted or lost files before recovering.
- It offer users 500MB free data recover volume.
How to use MyRecover?
- Download and install MyRecover.
- Select the drive containing your deleted or lost files and snap on “Scan”.

- In the wake of scanning, you can see the deleted files. Select the ones you need to recover and double-click them to preview.

- Click the Recover button and select a new location to save the recovered files to prevent data overwriting.
Way 4: Use the Official Recovery Tool
In the event that the above strategies don’t work, you can have a go at utilizing a command-line data recovery software given by Microsoft called Windows File Recovery. It upholds recovering different kinds of data on different storage devices. For details, you can check type winfr ? to learn.
- On your computer, download Windows File Recovery from the Microsoft Store and install it.
- In the Windows file search box, type Windows File Recovery and select it. Then, input yes to allow it to make changes.
- You can type the command based on the winfr syntax and the necessary parameters. For example, to recover deleted png files from drive D: to drive E:, enter: winfr D: E: /extensive /n *.png.
Way 5: Recover Hidden Data using CMD
On the off chance that the data isn’t covered up or deleted, you can utilize CMD to recover them. This strategy just deals with hidden data, not deleted files. The following are the instructions for recovering hidden data using the command prompt:
- In your Windows, open the search box and type cmd. Then, select Run as administrator to execute it.
- Type the command “attrib -h -r -s /s /d G:*.*” in the command prompt window and press Enter to shows hidden files. Replace the drive letter G: with your own.
Way 6: Use File Recovery Software
- When files are permanently deleted from the Recycle Bin or if the Recycle Bin is bypassed, specialized file recovery software can be used.
- WinfrGUI is a powerful tool that utilizes the Windows File Recovery command-line app with a graphical user interface.
- WinfrGUI enables users to scan their storage drives for deleted files and recover them with ease.
Ti potrebbe interessare:
Segui guruhitech su:
- Google News: bit.ly/gurugooglenews
- Telegram: t.me/guruhitech
- X (Twitter): x.com/guruhitech1
- Bluesky: bsky.app/profile/guruhitech.bsky.social
- GETTR: gettr.com/user/guruhitech
- Rumble: rumble.com/user/guruhitech
- VKontakte: vk.com/guruhitech
- MeWe: mewe.com/i/guruhitech
- Skype: live:.cid.d4cf3836b772da8a
- WhatsApp: bit.ly/whatsappguruhitech
Esprimi il tuo parere!
Ti è stato utile questo articolo? Lascia un commento nell’apposita sezione che trovi più in basso e se ti va, iscriviti alla newsletter.
Per qualsiasi domanda, informazione o assistenza nel mondo della tecnologia, puoi inviare una email all’indirizzo [email protected].
Scopri di più da GuruHiTech
Abbonati per ricevere gli ultimi articoli inviati alla tua e-mail.
