How to Connect Your Laptop to CZUR StarryHub?
In today’s fast-paced work environment, efficient communication tools and seamless connectivity have become increasingly important, especially in meetings that require frequent screen sharing. Connecting your laptop to a projector opens up endless possibilities for presenting, entertaining, and sharing content on a larger screen. In this article, we’ll walk you through how to connect both Windows and Mac laptops to the CZUR StarryHub meeting projector to enhance your work efficiency. Let us have a look at StarryHub first.
1. What is CZUR StarryHub?
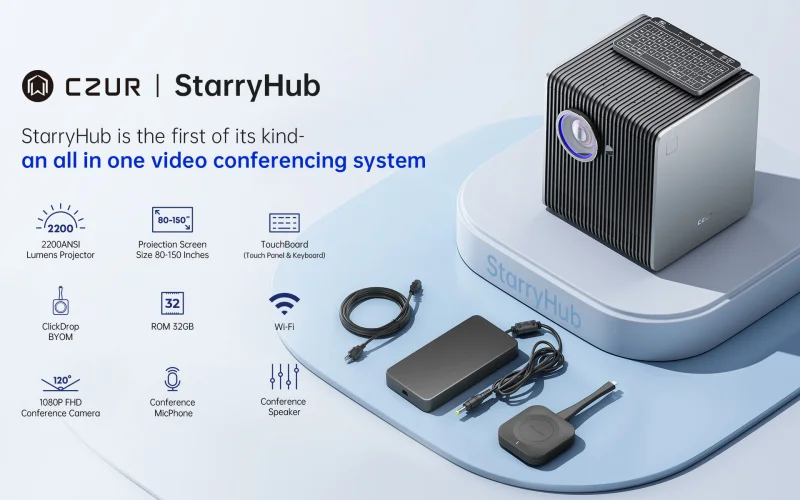
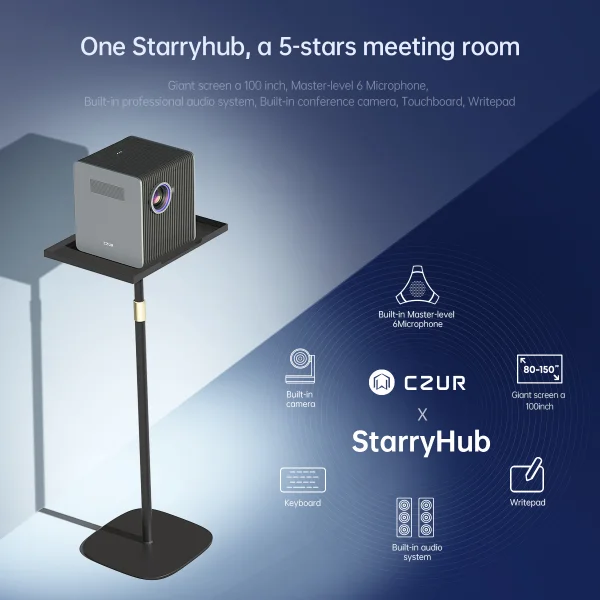
Designed to simplify professional communication, CZUR StarryHub is a comprehensive smart meeting projector. It removes the need for separate devices by combining a 360° microphone array, AI-powered wide-angle camera, and high-brightness projector. StarryHub’s wireless casting capabilities and proprietary StarryOS system turn any area into a productive, plug-and-play meeting room for modern businesses and hybrid teams.
2. StarryHub Features
StarryOS, a specially tailored Android-based operating system made for meetings, powers StarryHub. Major conferencing and productivity tools, including Zoom, Google Meet, Microsoft Teams, Webex, Chrome, and Office Suite, are fully compatible with it. High-speed performance and a clear 1080P video interface are available to consumers with no setup needed.
- Wireless File Transfer & Screen Sharing
The days of tangled HDMI cables are over. Instant wireless screen sharing from laptops, tablets, or smartphones is made possible via StarryHub’s support for Miracast for Windows/Android and AirPlay for Apple devices. This is improved with the CZUR Share software, which permits file transfers between devices and StarryHub. It only takes a few seconds to switch between devices while presenting presentations or demonstrating software.
- 4-Screen Wireless Casting
The ability of StarryHub to cast to up to four screens at once is one of its best features. For brainstorming sessions, side-by-side comparisons, or group projects involving several people, the special 4-Split Screen feature is ideal.
- Noise Reduction & Thermal Efficiency
StarryHub has an effective cooling system and a microphone system that reduces noise in conference rooms. It maintains excellent device performance, even during prolonged use, while operating at less than 24dB, guaranteeing a quiet meeting space.
- AI Audio and Video System
StarryHub features an AI-powered camera and microphone array, tailored for Small to medium-sized conference rooms to enable seamless remote collaboration. The 120° ultra-wide HD camera captures every participant clearly, while the 6-microphone array ensures 360° sound pickup up to 8–10 meters. With CZUR’s AI voice optimization and noise reduction, every voice is heard clearly—no shouting needed. StarryHub brings clarity and efficiency to large meetings.

3. How to Connect your Laptop to CZUR StarryHub Wireless?
Here are different ways of connecting your Laptop to CZUR StarryHub wirelessly:
1. CZUR Sharing App(Windows and macOS)
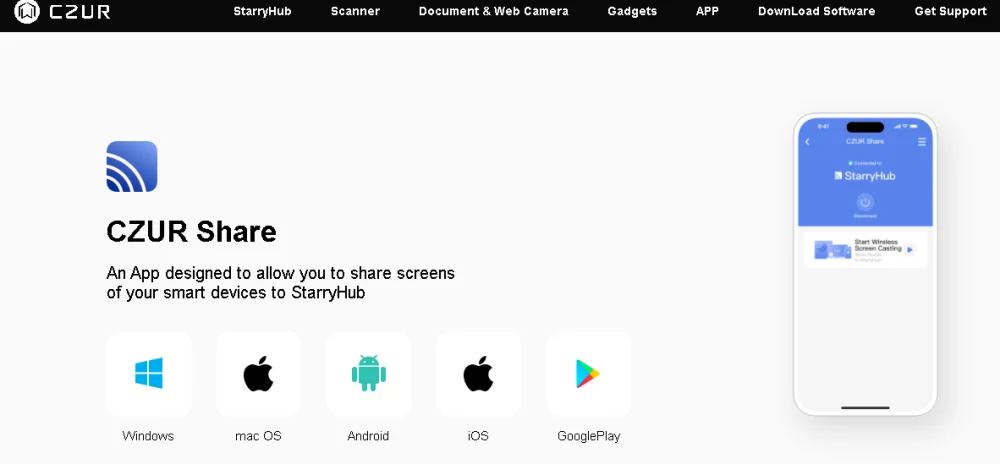
The simplest method for wirelessly connecting your laptop to the CZUR StarryHub is to use the CZUR Share app, which is compatible with both Windows and macOS.
Step 1: Download the Tool
The CZUR Share app is easy to use and is made to facilitate effective device management and connection. Downloading the required apps, CZUR Share, from the official CZUR website is the initial step. Getting the most recent versions is crucial if you want to benefit from all the features and enhancements that are available.
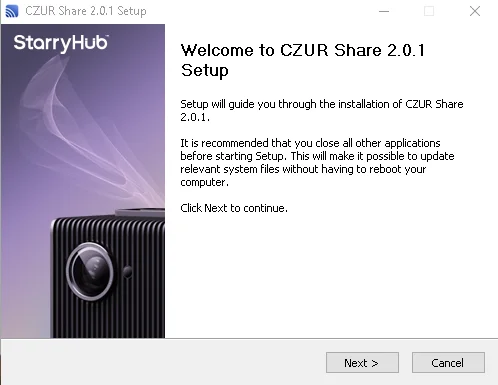
Step 2: Install the App
You must install the program files on your computer after downloading them. The system may ask you to grant administrator privileges during installation; this is common and required for the programs to work correctly, particularly when handling device firmware or running system diagnostics.
Step 3: Connecting PC with Wifi
Making sure your computer and the StarryHub device are linked to the same Wi-Fi network is an important next step after installing the program. To facilitate uninterrupted file transfers, content casting, and screen sharing between your computer and StarryHub, this shared connection is necessary.
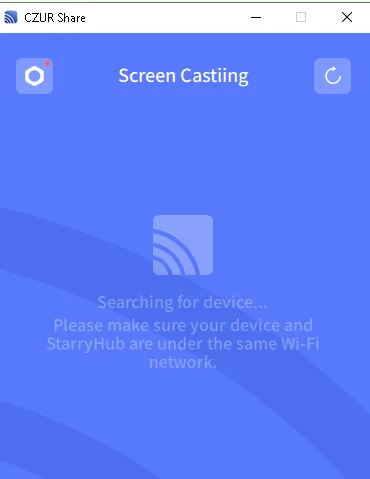
Step 4: Begin Casting
After everything is linked, launch the CZUR Share app to start sending files or your screen to the StarryHub device. For both business and personal use, the user-friendly interface makes it easy to exchange documents, movies, and presentations wirelessly.
2. Windows+P(for Windows)
Using the built-in Windows + P shortcut is one of the fastest ways to wirelessly connect your Windows laptop to the CZUR StarryHub. First, make sure the StarryHub device and your laptop are linked to the same wireless network. Then, to access the projection menu, hit Windows + P on your keyboard. Choose the StarryHub device from the list after selecting Connect to a wireless display. Once chosen, StarryHub will automatically reflect your laptop screen, providing a simple and cordless way to conduct meetings and presentations.
3. ClickDrop
One of the quickest and simplest methods to begin screen sharing and using the CZUR StarryHub for video conferences without requiring complex settings is to connect your laptop wirelessly using ClickDrop.
Step 1: Connect StarryHub and ClickDrop
Start by connecting your CZUR StarryHub to the ClickDrop wireless screen sharing device. To finish the pairing process, adhere to the on-screen directions that came with the device.
Step 2: Attach the laptop to ClickDrop And Start Screen Casting
After pairing, insert the ClickDrop dongle into the USB port on your laptop. This makes it possible for your laptop and StarryHub to connect. Press or click the ClickDrop dongle once it has been plugged in. Immediately, your laptop’s screen will begin wirelessly projecting to the StarryHub projector.
4. Airpaly (for MacOS)
If you want to know how to connect your laptop to CZUR StarryHub wireless using AirPlay. The data below will be beneficial for you.
Step 1: Join the same Wireless Network
First, confirm that the CZUR StarryHub and your laptop are linked to the same wireless network. This is crucial because if the devices are on different networks, AirPlay will not function.
Step 2: Go to the Screen Mirroring or AirPlay Settings
On a Mac, select the Control Centre by clicking on it in the upper right corner of the screen. The Screen Mirroring or AirPlay option is located there. For Windows users, the screen mirroring option can be found by pressing Windows + K or by going to Display settings.
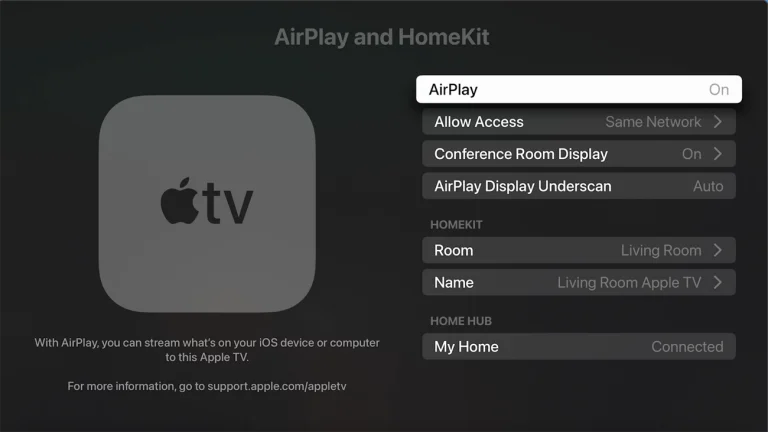
Step 3: Choose Your Display from StarryHub
Navigate to the screen sharing option and select the StarryHub from the list of devices that are accessible. To start connecting, click on it.
Step 4: Start Screen Mirroring
Once you select StarryHub, your laptop screen will mirror automatically. You can now wirelessly share content like presentations or videos—quickly and easily, with no cables or setup required.
Ending Talk
Connecting your Windows or Mac laptop to CZUR StarryHub is a smooth and flexible process, thanks to its support for multiple wireless casting options like CZUR Share, Miracast, AirPlay, and ClickDrop. StarryHub’s user-friendly setup and support for multiple operating systems guarantee that meetings begin promptly and proceed smoothly. StarryHub is more than just a casting tool; it is one of the greatest meeting projectors with support for the best dimensions of a 100-inch screen.
Ti potrebbe interessare:
Segui guruhitech su:
- Google News: bit.ly/gurugooglenews
- Telegram: t.me/guruhitech
- X (Twitter): x.com/guruhitech1
- Bluesky: bsky.app/profile/guruhitech.bsky.social
- GETTR: gettr.com/user/guruhitech
- Rumble: rumble.com/user/guruhitech
- VKontakte: vk.com/guruhitech
- MeWe: mewe.com/i/guruhitech
- Skype: live:.cid.d4cf3836b772da8a
- WhatsApp: bit.ly/whatsappguruhitech
Esprimi il tuo parere!
Che ne pensi di questa notizia? Lascia un commento nell’apposita sezione che trovi più in basso e se ti va, iscriviti alla newsletter.
Per qualsiasi domanda, informazione o assistenza nel mondo della tecnologia, puoi inviare una email all’indirizzo [email protected].
Scopri di più da GuruHiTech
Abbonati per ricevere gli ultimi articoli inviati alla tua e-mail.