

AI Image to Video Generator: Turning a Single Frame into a Directed Story
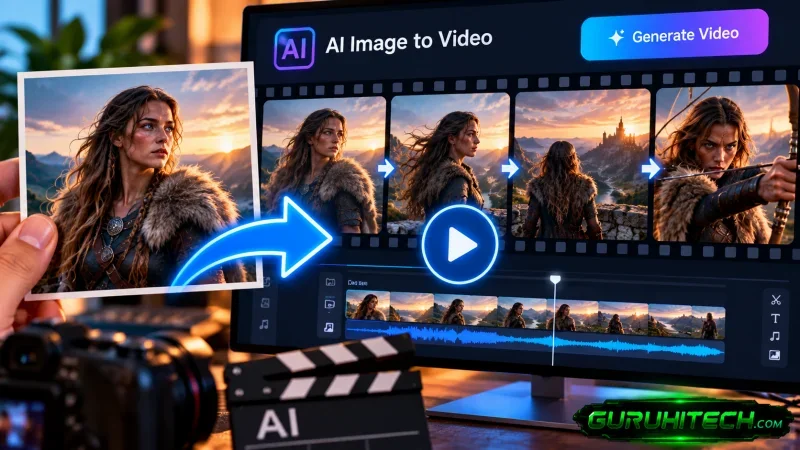
A photograph captures the moment a scene becomes memorable. Video reveals what happens next: a curtain catches the breeze, a reflection moves across glass, or a person pauses before turning toward the camera. For creators working with still images, that missing movement has traditionally required another shoot, manual animation, or a separate production budget.
An AI image to video generator creates a different starting point. The photograph supplies the visual foundation, while a written instruction describes how the scene should develop.
Photo to Video AI brings this approach into an online workspace with image uploads, compatible model selection, motion prompts, generation settings, credit estimates, and output previews. The creative opportunity is substantial—but useful results still depend on making deliberate choices.
The real skill is learning how to direct the movement already suggested by an image.
I. What Makes an AI Image to Video Generator Useful?
The strongest reason to start with an image is specificity. A product photograph already establishes the bottle shape, material, lighting, and background. A portrait provides a face, expression, wardrobe, and composition. An illustration defines its own character design and visual language.
An ai image to video generator lets creators use those visible details as the starting reference while describing action through text.
This changes the writing task. Instead of reconstructing the entire scene in a prompt, the creator can concentrate on three questions:
- What should the subject do?
- How should the camera move?
- Which details should remain recognizable?
Consider a photograph of a ceramic cup beside a window. A focused direction might ask for steam to rise while the camera slowly moves closer. That gives the generation a readable purpose without introducing unrelated actions.
The source image remains a guide rather than a guarantee. Faces, lettering, reflections, and newly revealed surfaces still need careful review.
II. A Concrete Model Example: Kling 3.0
Photo to Video AI offers a dedicated Kling AI Image to Video marketing page, making Kling 3.0 a concrete example of the platform’s model-based workflow.
Its image-to-video experience combines a source image with instructions for subject movement, camera behavior, atmosphere, and details to preserve. The site describes Kling 3.0 clips ranging from 3 to 15 seconds, allowing creators to test a brief action or give a shot more time to develop.
The application’s pricing configuration explicitly defines Standard and Professional modes, with different rates for silent and audio-enabled generation:
| Kling 3.0 setting | Configured credits per second | Four-second example |
| Standard, silent | 30 | 120 credits |
| Standard, audio enabled | 40 | 160 credits |
| Professional, silent | 40 | 160 credits |
| Professional, audio enabled | 60 | 240 credits |
These figures describe the site’s configured generation credits, rather than a universal cash price. The form’s live estimate should guide the actual submission.
For an initial product-motion test, four seconds in Standard mode without audio provides a specific, budgetable experiment. Once the movement works, a creator can decide whether a longer duration, another mode, or generated sound serves the shot.
III. Prompting an AI Image to Video Generator Like a Director
A useful motion prompt describes a shot that can be understood and evaluated. Adding more adjectives does not automatically create better direction.
A practical structure is:
Subject action + camera movement + environmental motion + preservation instructions.
For a perfume photograph, an original prompt could read:
“The perfume bottle stays upright as the camera makes a gentle lateral move. A narrow highlight travels across the glass, with soft background movement. Keep the bottle silhouette, cap, label placement, and pedestal consistent. End on a steady product view.”
Each instruction has a job. The stationary bottle limits subject movement, the lateral camera move defines the viewing change, the highlight adds activity without requiring a complex transformation. The final sentence identifies the details that matter.
Photo to Video AI also includes prompt templates for Natural motion, Slow push-in, Smooth orbit, and Dynamic action. These offer starting directions that users can adapt to their images.
The choice should follow the source material. A gentle push-in is a reasonable first experiment for a tightly framed portrait. An orbit asks the generation to reveal surfaces that the photograph may not show, so the result deserves closer inspection.
For short clips, one main action and one camera movement make revision easier.
IV. From Upload to Download: A Practical Workflow
Using an AI image to video generator becomes more manageable when each stage answers a clear creative question.
1. Choose a source image with usable information
Photo to Video AI accepts JPG, PNG, and WEBP uploads. Select an image with a clearly visible subject, readable edges, and enough space for the intended motion. If a hand or product component is heavily cropped, movement involving that detail may be harder to control.
2. Select Kling 3.0 for this example
Open the compatible model menu and choose the model deliberately. Review the controls displayed for that selection, since settings vary between models.
3. Describe a single shot
For a portrait, begin with a restrained action such as one blink and a small head movement. For a food image, try rising steam with a slow camera approach. Match the instruction to what the picture can plausibly support.
4. Check settings and credits
Choose the duration, mode, and sound setting needed for the experiment. Review the displayed credit requirement before generating.
5. Preview the complete result
Watch beyond the opening frame. Inspect the subject’s outline, facial features, hands, text, reflections, and background structures throughout the clip.
6. Refine one variable
If the product changes shape during a camera orbit, try a smaller camera move. If the action feels rushed, simplify it or reconsider the duration. Generate another version after making a specific adjustment, then download the result that meets the brief.
V. Where Image-to-Video Fits into Real Creative Work
The value of an AI image to video generator becomes clearer when the output has a defined purpose.
- Product marketing. Existing photography can become material for short reveals, social advertising concepts, and landing-page visuals. A controlled camera move around a shoe or a changing highlight on cosmetic packaging can help explore a campaign direction. Brand details should be checked before publication.
- Portrait and fashion content. A restrained expression, subtle fabric movement, or gentle camera approach can add motion to an approved image. Clear faces and uncluttered poses provide an easier starting point for review.
- Illustration and visual storytelling. An illustrated scene can be directed through drifting leaves, flickering light, or layered camera movement. Preservation instructions help communicate the importance of the original drawing style and character design.
- Family photographs. Small movements can create a personal animated keepsake. The resulting motion is newly generated; it does not recover an event recorded by the original camera.
Across these uses, a clear brief provides a better success criterion than movement alone.
VI. How to Judge the Result
An attractive opening does not tell the whole story. A useful AI image to video generator output must hold together while the scene changes.
Review it from three perspectives.
- Visual continuity: Does the subject remain recognizable? Check a product’s proportions, a portrait’s facial structure, and the shape of important objects.
- Motion clarity: Can the viewer understand the intended action? Too many competing movements can make a short clip difficult to read.
- Delivery purpose: Does the framing and pacing suit the destination? Review the selected model’s available output controls before generating, particularly when preparing material for a specific placement.
When audio is enabled, listen to the result as carefully as you watch it. Sound should support the scene, and any speech or lip movement needs its own review.
These checks turn experimentation into a repeatable creative process.
VII. Start with One Image and One Clear Movement
An AI image to video generator gives still images another creative life. Its usefulness comes from the connection between the source photograph, the motion brief, the selected model, and the final review.
Photo to Video AI brings those decisions into a single workflow. Kling 3.0 provides one concrete route, with configurable clip duration, Standard and Professional pricing, sound options, and a visible credit estimate.
Start with a clear image. Choose a movement that belongs in the scene. Generate a short test, inspect the details, and refine the direction.
A compelling clip begins with a decision about what should happen next.
Ti potrebbe interessare:
Segui guruhitech su:
- Google News: bit.ly/gurugooglenews
- Telegram: t.me/guruhitech
- Facebook: facebook.com/guruhitechfb
- X (Twitter): x.com/guruhitech1
- Bluesky: bsky.app/profile/guruhitech.bsky.social
- Rumble: rumble.com/user/guruhitech
- VKontakte: vk.com/guruhitech
- MeWe: mewe.com/i/guruhitech
- Skype: live:.cid.d4cf3836b772da8a
- WhatsApp: bit.ly/whatsappguruhitech
Esprimi il tuo parere!
Ti è stato utile questo articolo? Lascia un commento nell’apposita sezione che trovi più in basso e se ti va, iscriviti alla newsletter.
Per qualsiasi domanda, informazione o assistenza nel mondo della tecnologia, puoi inviare una email all’indirizzo [email protected].
Scopri di più da GuruHiTech
Abbonati per ricevere gli ultimi articoli inviati alla tua e-mail.