
How to Upgrade Low-Res Marketing Videos and Photos for High-Converting Campaigns
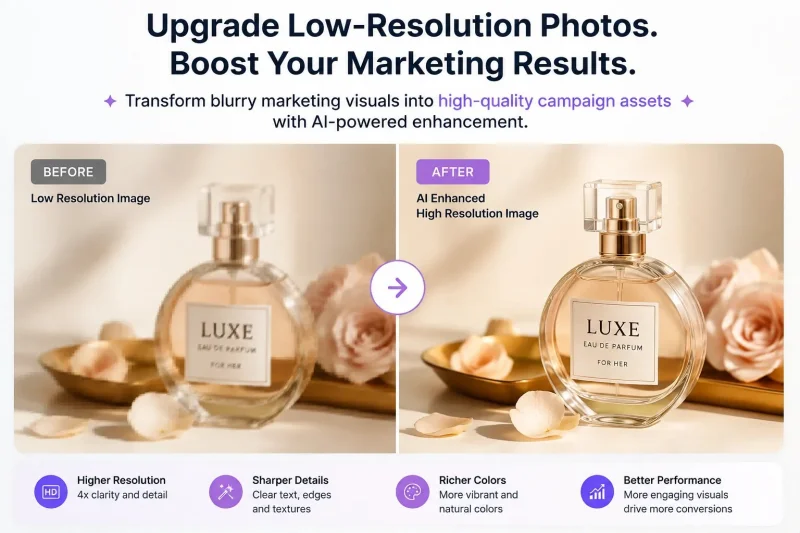
A strong campaign idea can still underperform when the creative looks soft, compressed, or recycled. Blurry product details reduce confidence. A watermark distracts from the call to action. Enlarging a small image can introduce jagged edges or make faces look unnatural.
The good news is that you may not need a reshoot. With a careful workflow, older or low-resolution assets can often be cleaned, enlarged, reformatted, and tested as polished campaign creative. The key is to treat AI enhancement as one stage in a larger production process, not as a substitute for quality control.
This guide shows marketers and content creators how to turn imperfect source files into sharper, more useful visual assets without losing sight of brand consistency or conversion goals.
1. Start With a Creative Audit
Before editing anything, collect the original files and identify how each asset will be used. The best treatment depends on the destination.
For every image or video, note:
- The original dimensions and file format
- Whether the file has already been compressed
- The intended placement, such as a feed ad, story, landing page, email, or marketplace listing
- Important details that must remain accurate, including product labels, colors, faces, and on-screen text
- Distractions such as watermarks, outdated logos, borders, or embedded captions
- The campaign objective and primary call to action
Whenever possible, work from the highest-quality source rather than downloading a compressed copy from a social platform. AI can reconstruct the appearance of detail, but it cannot guarantee that invented pixels match the original product perfectly.
Use three simple categories during the audit: ready, repairable, and replace. A clear but undersized product photo is usually repairable, a heavily compressed clip may still work as a small mobile placement. A source with unreadable product information or severe motion blur may need to be replaced rather than enhanced.
2. Remove Watermarks Before Resizing
Watermarks can make legitimate, owned footage feel like a reused draft. They also compete with your logo, headline, and call to action. Clean them before upscaling or adding new campaign graphics. Otherwise, enlargement and sharpening may make the unwanted mark more prominent.
For an efficient first pass, an AI tool that can remove watermark from video may help reconstruct the covered area across frames. Results tend to be strongest when the watermark sits over a simple, stable background. Busy patterns, moving subjects, reflections, or text behind the mark require closer review.
Use this process:
- Upload the best available version of the clip.
- Select only the watermark area so the rest of the frame remains untouched.
- Preview several sections, including cuts and moments with rapid movement.
- Check the repaired area frame by frame at normal size and at 100% zoom.
- Export a clean master before adding your current logo, captions, or call to action.
Only remove a watermark when you own the asset or have permission to modify it. A visible mark can indicate ownership or licensing restrictions; removing it does not create usage rights.
3. Upscale Images With a Clear Target
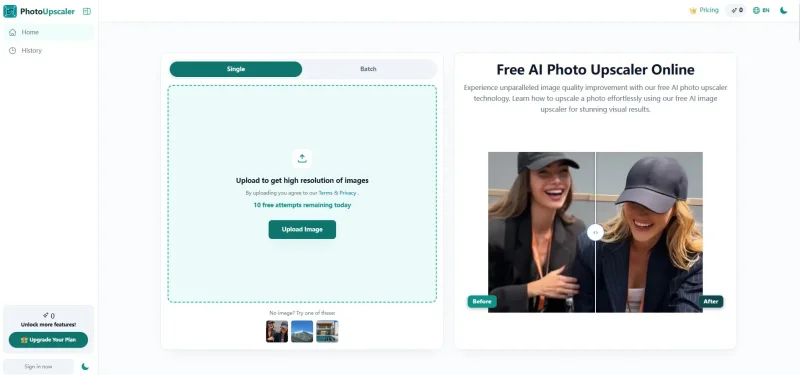
Traditional resizing stretches existing pixels. AI upscaling estimates additional visual detail, which can produce cleaner edges, more legible textures, and a better-looking large-format asset. However, more pixels do not automatically mean more persuasive creative.
Choose the final placement before selecting an enlargement level. A small email image may need only modest enhancement, while a landing-page hero or large crop may need more room. Avoid enlarging every file to the maximum setting by default. Excessive upscaling increases file size and can amplify artifacts.
An 8k photo upscaler AI can be useful when a source image must support a large canvas, multiple crops, or close product views. Treat 8K as an available output range rather than a quality promise. The source still determines how much trustworthy detail can be recovered.
For better results:
- Remove unwanted overlays before upscaling.
- Crop loosely at first so you retain flexibility for different placements.
- Use moderate noise reduction on compressed images.
- Compare skin, hair, logos, packaging text, and straight edges with the original.
- Reduce artificial sharpening if fine textures look crunchy or outlined.
- Export one high-quality master, then create smaller delivery versions from it.
Product accuracy matters more than dramatic enhancement. If an AI-generated label character, button, seam, or color differs from the real item, mask that area, restore it from the original, or choose a less aggressive setting.
4. Build Channel-Specific Versions
One upgraded master should feed several deliberate variants. Do not rely on a platform to crop the creative automatically.
Create versions for the aspect ratios and placements in your campaign plan. Reframe each one so the product, face, offer, and call to action remain visible in the safe area. Vertical placements often need a tighter composition than landscape or square placements. On small screens, reduce secondary copy instead of shrinking all text.
Keep important visual information away from edges that may be covered by interface controls. For video, verify that captions remain readable and that the opening frames communicate the subject even when sound is off. For landing pages, reserve enough space around the focal point for responsive crops and overlay copy.
This is also the moment to add current brand elements. Use the approved logo file, typefaces, colors, disclaimers, and campaign message. A technically sharp asset can still feel inconsistent if every placement uses different branding.
5. Optimize for Speed Without Giving Back the Quality Gain
Large files can slow landing pages and delay the moment when a visitor sees the offer. The goal is not the biggest possible file; it is the smallest file that looks clean in its actual placement.
Keep a lossless or high-quality master outside the publishing system. From that master, export delivery files at the dimensions required by each placement. Use modern image formats when the destination supports them, and apply video compression only after all edits are complete.
Check the final asset on a real phone as well as a desktop monitor. Look for banding in gradients, smeared fine details, fuzzy text, delayed loading, and excessive sharpening. A file that looks perfect in an editor can behave differently after a platform processes it again.
6. Run a Conversion-Focused Quality Check
Visual cleanup should support the campaign message rather than become the objective itself. Before launch, review each asset with two sets of questions.
Technical Checks
- Is the focal subject sharp at the displayed size?
- Are faces, hands, products, and logos free of AI artifacts?
- Does the repaired watermark area remain stable throughout the video?
- Are colors consistent with the real product and the brand palette?
- Is on-screen text readable on a small display?
- Does the asset load quickly enough for its placement?
Conversion Checks
- Can viewers understand the offer in the first glance or opening seconds?
- Does the composition direct attention toward the product or call to action?
- Is the visual specific enough to support the claim being made?
- Does the creative feel trustworthy rather than overprocessed?
- Is there one clear next step?
Ask someone who did not edit the asset to perform the final review. Editors quickly become accustomed to small defects that a first-time viewer may notice immediately.
7. Test the Upgrade, Not Just the Asset
Do not assume the sharpest version will always win. Create a controlled test against the original or current campaign creative. Keep the audience, offer, copy, placement, and call to action consistent so the visual treatment is the main variable.
Choose a primary metric that matches the campaign stage. A cleaner thumbnail may improve click-through rate, while a more accurate product image may have a greater effect on conversion rate or return rate. Supporting metrics such as watch time, landing-page engagement, and cost per acquisition can explain why one version performs better.
Run the test long enough to collect a useful sample, then document the result. Over time, your records may reveal that certain improvements matter more for particular audiences or formats. For example, clearer product texture may lift shopping ads, while a cleaner opening frame may matter more for short-form video.
Common Mistakes to Avoid
Upscaling the wrong source. A compressed social download will usually contain fewer trustworthy details than the original camera export.
Enhancing before cleaning. Removing a watermark after upscaling can make the repair area larger and more difficult to blend.
Trusting the preview alone. Inspect full exports because encoding can introduce new defects.
Making every asset 8K. Oversized outputs waste storage and bandwidth when the placement displays a much smaller image.
Ignoring factual accuracy. AI may create plausible-looking details that are not present in the real product.
Publishing one crop everywhere. Automatic cropping can hide the offer, cut off a face, or place interface controls over the call to action.
Changing too many variables in a test. If the image, headline, audience, and offer all change, you will not know what drove the result.
Turn Imperfect Sources Into Testable Campaign Assets
Low resolution does not always mean low potential. The strongest workflow starts with the best available source, removes distractions, enlarges only as much as the placement requires, and finishes with channel-specific crops, compression, and human review.
Most importantly, judge the result by what the audience can understand and trust. A successful upgrade preserves product truth, strengthens visual hierarchy, and gives the campaign a fair test. When cleanup and AI upscaling serve those goals, yesterday’s imperfect files can become useful, high-quality assets for today’s marketing channels.
Scopri di più da GuruHiTech
Abbonati per ricevere gli ultimi articoli inviati alla tua e-mail.