Converting PNG To SVG Files Without Bloated Path Markup
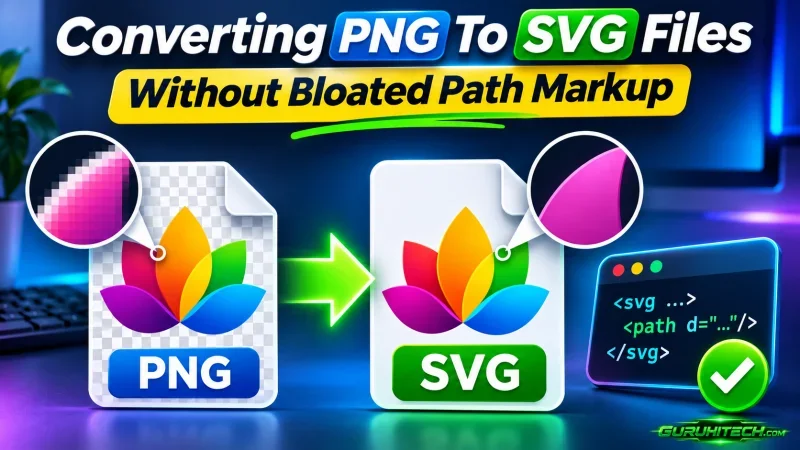
Front-end developers updating a client landing page or digital catalog often face the same graphic problem: a partner provides a small raster logo that becomes pixelated when displayed in a high-resolution header or presentation. Converting PNG to SVG seems like the simplest solution, but traditional auto-trace tools can generate bloated SVG markup filled with unnecessary anchor points, fragmented colors, and complex vector paths that are difficult to edit.
The problem usually comes from poor-quality source images and pixel-by-pixel tracing rather than the SVG format itself. AI-powered vectorizers such as ToSVG AI reconstruct flat color regions into smooth curves and cleaner shapes instead of following every pixel irregularity. They can also preserve transparent backgrounds, making the resulting vector graphics easier to use in websites, stylesheets, and design applications.
Why Traditional PNG to SVG Converters Create Bloated Paths
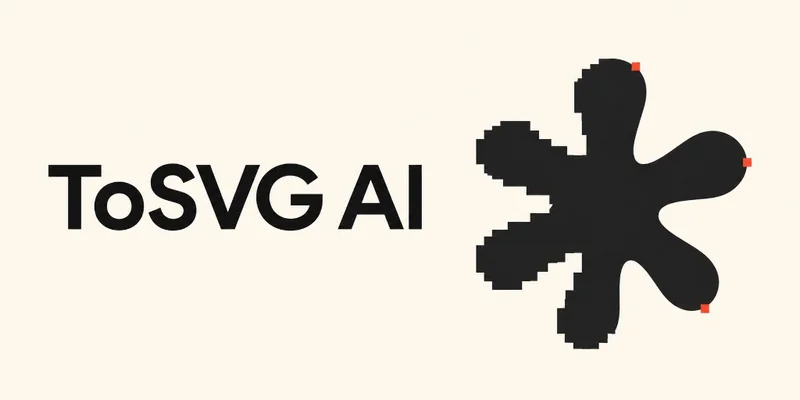
Traditional image tracing algorithms follow individual pixel boundaries, including small color variations caused by compression artifacts. When converting a low-resolution logo downloaded from social media or messaging apps, this process can generate hundreds of unnecessary vector nodes, fragmented shapes, and bloated SVG path markup.
These problems become clear when opening the converted file in Inkscape or browser DevTools. A simple two-color logo can produce complex path coordinates that increase SVG code size, complicate CSS recoloring, and require extensive manual cleanup. Thin lettering and geometric elements may also become distorted when scaled for larger displays.
AI-powered PNG to SVG conversion uses shape-aware reconstruction to reduce this geometric noise. Straight lines remain precise, curved elements require fewer control points, and uniform color areas become cleaner vector shapes. For developers and designers maintaining website icons or preparing logos, this can simplify editing in Figma, Illustrator, and other vector design tools.
Preparing Raster Images for Clean SVG Conversion
Before uploading an image to an AI SVG converter, check the supported file formats, dimensions, and size limits. ToSVG AI accepts PNG, JPG, and WebP images under 5 MB, with dimensions between 257 and 4,095 pixels per side and a maximum of 16 megapixels.
Using a suitable source image helps the vectorizer distinguish sharp edges from background noise and reduces unnecessary corrections after conversion.
Use the Original Image and Remove Empty Margins
For the best PNG to SVG conversion results, always use the original image exported from your design software instead of a cropped screenshot or compressed file from a messaging app. Heavy compression can create blurred edges, gray halos, and unwanted artifacts around fine text and thin outlines, causing AI vectorizers to generate unnecessary SVG paths.
Before uploading your image, remove excess whitespace, decorative frames, and unwanted shadows. A tightly cropped, high-quality source helps produce cleaner SVG vector graphics, with fewer redundant nodes and more accurate shapes.
Preserve Transparency When Converting PNG, WebP, and JPG
The original image format affects the final SVG output. Transparent PNG and WebP files allow AI image-to-vector converters to preserve clear backgrounds, making logos suitable for dark navigation bars, colored website sections, and presentation slides.
JPG files do not support transparency, so their backgrounds may become part of the converted vector artwork. Removing unwanted backgrounds before conversion can prevent additional SVG shapes and reduce manual cleanup.
How to Convert PNG to SVG in Three Simple Steps
Once the original image is prepared, ToSVG AI provides a straightforward browser-based workflow for converting raster graphics into editable vector paths. The process does not require manual adjustment of tracing thresholds or complicated vectorization settings.
- Upload your image: Select a PNG, JPG, or WebP file in the Image to SVG section. Alternatively, use Text to SVG to generate vector artwork from a written description.
- Compare the results: Use the Drag to compare slider to inspect the generated vector against the original image, focusing on sharp corners, fine lettering, and color boundaries.
- Download the converted file: Free accounts can download a watermarked PNG preview, while paid plans provide access to editable SVG downloads and saved conversion history.
The platform displays the required credit cost before processing and automatically refunds credits if a conversion task fails.
Check SVG Curves, Corners, and Text Before Downloading
Before downloading your converted SVG, carefully inspect the comparison preview. Move the slider across thin strokes, rounded letters, geometric shapes, and neighboring colors to identify possible distortions.
If lettering becomes unreadable or important details lose their original proportions, retry the PNG to SVG conversion using a cleaner source image. Detecting these problems early prevents defective graphics from reaching a live website or design project.
Edit and Recolor SVG Files in Vector Design Software
Unlike raster images embedded inside an SVG container, properly converted vector files contain editable paths that can be modified in Adobe Illustrator, Inkscape, Figma, Affinity Designer, or Cricut Design Space.
Designers can adjust colors, refine curves, combine overlapping shapes, and prepare graphics for different applications. Saved conversion history also makes it easier to revisit previous projects when a logo or icon requires updated branding.
Common Mistakes When Converting Images to SVG
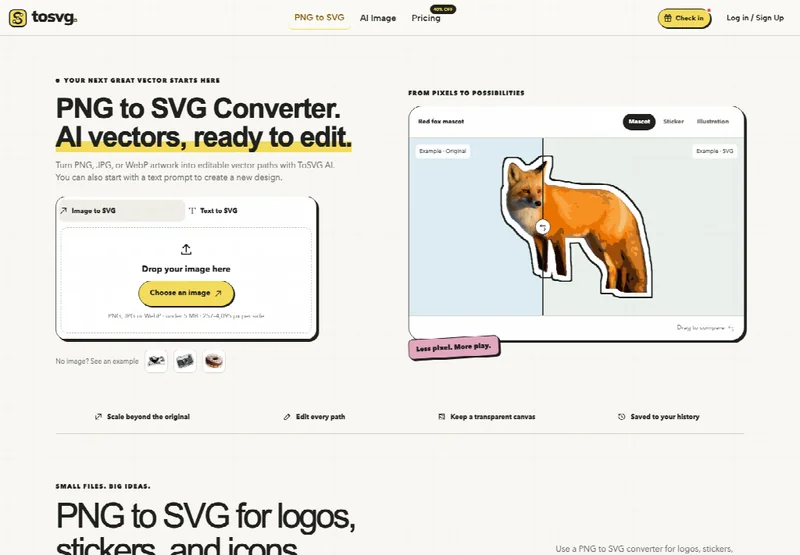
Even with advanced AI vectorization tools, the quality of the original artwork strongly influences the final result. SVG conversion works particularly well for flat logos, icons, stickers, sketches, and illustrations with clearly defined shapes.
Detailed photographs containing complex gradients and millions of colors are less suitable. Converting them into SVG typically produces stylized illustrations rather than perfectly scalable photographic images.
Avoid these common mistakes:
- Uploading blurry text: AI vectorizers cannot reliably reconstruct lettering when the original characters are too small or distorted.
- Keeping complex backgrounds: Textures, shadows, and unwanted details can create additional SVG shapes that require manual removal.
- Ignoring commercial licensing: ToSVG AI monthly and yearly subscriptions include a downloadable commercial license, while one-time credit packs do not. You must also have the necessary rights to the original artwork.
- Downloading the wrong format: Make sure you export the editable SVG rather than a watermarked PNG preview when preparing files for professional use.
Following these precautions helps produce cleaner SVG files with fewer unnecessary paths, making vector graphics easier to edit and integrate into websites or design projects.
Using AI Vectorization for Faster Website Maintenance
Teams managing websites, presentations, icon sets, and promotional graphics often need to convert PNG to SVG without spending hours manually redrawing low-resolution logos. Automated vectorization does not replace professional logo design, but it simplifies everyday asset recovery by transforming suitable flat graphics, sketches, and illustrations into scalable, editable vector paths.
For developers and designers dealing with bloated SVG markup, ToSVG AI offers cleaner vector output, transparency preservation, and saved conversion history. Start with a tightly cropped image, inspect the results using the comparison slider, and make final adjustments in your preferred vector editor to keep graphics sharp across different screen sizes.
Ti potrebbe interessare:
Segui guruhitech su:
- Google News: bit.ly/gurugooglenews
- Telegram: t.me/guruhitech
- Facebook: facebook.com/guruhitechfb
- X (Twitter): x.com/guruhitech1
- Bluesky: bsky.app/profile/guruhitech.bsky.social
- Rumble: rumble.com/user/guruhitech
- VKontakte: vk.com/guruhitech
- MeWe: mewe.com/i/guruhitech
- Skype: live:.cid.d4cf3836b772da8a
- WhatsApp: bit.ly/whatsappguruhitech
Esprimi il tuo parere!
Ti è stato utile questo articolo? Lascia un commento nell’apposita sezione che trovi più in basso e se ti va, iscriviti alla newsletter.
Per qualsiasi domanda, informazione o assistenza nel mondo della tecnologia, puoi inviare una email all’indirizzo [email protected].
Che ne pensi?
Scopri di più da GuruHiTech
Abbonati per ricevere gli ultimi articoli inviati alla tua e-mail.